LIFT YOUR LIFE with Laura
  • home
    • my story
  • work with me
    • personal training >
      • testimonials
      • the studio
  • contact

BLOG

2019 fit friend holiday gift guide

11/25/2019

0 Comments

 
Complete list with Fit gifts for women this holiday season. Give the perfect gift to your fit friend gift ideas.
We all have that friend who loves to workout...  If they're on your holiday shopping list this year, here's my top 13 picks for gifts sorted by price.  These links are mostly to Amazon too, hopefully making your life easier!

​Let's get straight to the links and get you one step closer to DONE WITH SHOPPING!

UNDER $15

magnesium supplement ($15):
Magnesium is super important for muscle recovery.  This is a tasty drink mix to add an extra dose of love to your fit friend's diet.  These to-go packs are great for a gym bag!
mini resistance bands ($6):
Super lightweight and easy to pack, resistance bands are great picks for your friend who's always on the go.  These are the ones I have in my own gym and take with me to on-site client sessions.
​running lights ($15):
Have a runner on your list?  These clip on lights will help them stay more visible on early morning and late evening runs.

UNDER $30

Vital Proteins collagen peptides ($25):
If your fit friend has been doing this for awhile, they know they need to eat their protein.  This is how I add an extra dose to my diet every day!
funny workout tank ($28):
OMG Becky, look at her deadlift.  Enough said!
​Squat Sponge ($20):
I bought one of these for my home gym AND one for the gym I train clients at.  It's great for hip thrusts too!
Takeya water bottle ($24):
This is the bottle I have, it doesn't leak and keeps water cold!  I like the fact that it's a big spout so I can guzzle water when needed.
pull-up bands ($20-$40):
These are BIG bands that can be looped around a pull-up bar to help your friend nail their first pull-up.  I advise giving them a set of two or three.  This brand has a cheat sheet to help pick a good set.
ab wheel ($17):
This is the ab wheel I have in my own home gym.  It definitely gives you a big bang for your buck!

UNDER $85

​Bosu Ball ($80):
Bosu Balls are great for the friend who likes to work out at home, they're also an important piece of equipment in my own workouts!
Versa Gripps wrist straps ($65):
If your friend is a weight lifter, these straps are a must!  I use these to help me deadlift so I can get more reps in!
suspension trainer ($40)
Suspension training is a great tool to have at home if you don't have much space.  This kit gives your friend two options for mounting the straps.

BIG SPENDS

squat rack ($300):
This is the exact rack I bought for my own basement gym and I love it.  It's simple, no frills and pretty easy to put together.  It's even travelled with me from our old house to our new one!

Have more people to shop for?  Check out my other gift guides:

green living
foodie

Pin now, shop later!

Click for fit friend gift ideas. Top fit gifts under $100. Gift ideas for fit women.
Click for gift guide fit girl, gift guide 2019, gift guide fitness. Fitness lovers gift guide
Click for gift guide for fitness lovers. Fit girl gift guide. Gifts under $100 for fit women
0 Comments

how i built my (weight lifting) home gym

3/13/2019

4 Comments

 
How to build a home gym when you like lifting weights. Build a home gym for less than $1,200 with these items! #liftyourlifewithlaura #weightlifting #homegym #homegyminspiration #workouttip #liftweights

I was spoiled by my college gym...

College was when I found my love of weight lifting, and I was SPOILED by my school's gym.  It had ALL the "toys" I could ever dream of there.  I used it as much as I could for about two years, and then...  I graduated. 

After graduation, I moved in with my then boyfriend (now husband) and struggled to find a job.  I also struggled without a gym...  I didn't want to pay for a gym membership after being spoiled by a "free" membership to the college gym, so I just couldn't bring myself to pay some big name gym every single month. 

After doing some research and talking it over with my husband, I decided to start piecing together my own home gym about five years ago.  Keep reading for the steps I took to building a great home gym without breaking the bank!

weights are heavy... and expensive...

You've probably seen all the other pins on Pinterest talking about building a home gym with "no weights", "minimal equipment", etc...  But what if you LIKE using the big stuff?  This is the exact issue I had.  Weights are fun, but because they are heavy they are also pricey.  I started out with all the "typical", "cheap" things that you see on those Pinterest lists like a mat, stability ball, mini bands, etc.  But I knew deep down that I NEEDED more. 

The list below shows the exact order I purchased things and the prices I paid!
1. DUMBBELLS:
Dumbbells were priority number one for me, and they were one of the most intimidating purchases too because of the expense and because there's just so many types!  To not clutter our basement, I decided to find a set of adjustable dumbbells.  To not break the bank, I also decided to buy these dumbbells USED because really, a weight is a weight.  It doesn't matter if it's scuffed, rusty etc, all it's doing is weighing you down.  On average, you will pay AT LEAST a dollar a pound for the most basic dumbbells (new), but when buying them used, I was able to get about 200 lbs of weight for only $100.  I found this deal by scouring Craigslist (Facebook marketplace didn't exist back then) until I finally found a used set of dumbbells really similar to these.  Once I brought those home, I thought I would be set for awhile, until I decided to bench press with them.

2. BENCH
At first, I thought I could get away with benching on my stability ball, but there was just no way for me to keep my neck in a comfortable position for that long.  So...  next on my list was a
 flat weight bench.  I am pretty sure I tried to find a bench like this on Craigslist, but when I couldn't find anything used, I went to Amazon.  I still have this bench today and it works great, but every so often I do need to retighten the bolts.

3. BARBELL (#1)
I love barbells.  Working with them makes you feel like a bad ass, and they are just so convenient when you want to pick up heavy stuff like I was used to doing.  My college gym had beautiful Olympic bars, plates and racks and I had no idea that there was any other type.  I looked up these Olympic barbells (2" diameter on the ends) online and was shocked by their price.  So, I then discovered standard bars and plates (1" diameter on the ends).  These bars would be a perfect fit for the weight plates that I already had from my adjustable dumbbells, so I decided to buy a bar for deadlifting.  The bar I chose was the cheapest I could find and also the shortest  (in order to save space). 

4. SQUAT RACK
So I could bench, I could deadlift, I could do any accessory work I wanted with dumbbells, but I couldn't really squat like I wanted to.  Sure I could put dumbbells up on my shoulders, do goblet squats, or overhead press the bar up on my shoulders, but my shoulders then limited how much weight I could use.  This dilemma really got to me (to the point where I just couldn't take it anymore) about 3 months after buying my dumbbells and so my quest started for a rack.  This was definitely going to be my biggest purchase, so I made sure to do my research.  I didn't need anything fancy, but I wanted something that would keep me SAFE.  To me, that meant a power rack (four corners that "box" you in) rather than just a squat rack (only two supports for the barbell).  At the time I purchased my rack, it was NOT available on Amazon, but here it is now, even with free shipping (which I didn't get 5 years ago).  This specific power rack from Titan Fitness was easy to assemble and HEAVY, a great safety feature.  It has a pull up bar, safeties, and was easy to assemble for my husband and I.  I have even taken this rack apart and moved it to a new basement, and we had no issues at all! 

This was definitely the biggest purchase, but it was also the most useful and paid for itself easily.  Right now you can get it for $335, so let's do the math.  At the time I am writing this article, Goole says that the average cost for a gym membership is $58 per month. 

$335 / $58 = 5.77 months.  Say what? 

​You can make up the cost of that squat rack in 6 months???  Even if you live somewhere that a gym membership is HALF that, you could still make up the cost of the squat rack in a year.  And who knows, maybe you can even find a used power rack near you for cheaper!


5. BARBELL (#2)
Remember how I bought a short barbell in step 3 to save space?  This decision bit me in the butt really...  Please keep in mind that you need a 7' barbell (not 6') in order to make it span the width of a squat or power rack.  This is the exact reason I now have two barbells (this is the 7' bar I bought).  One stays on the floor for deadlifts, and one stays in my power rack for benching and squatting.
LIKE WHAT YOU'RE READING?  SIGN UP FOR MORE!

Signup here:

Thank you!

You have successfully joined our subscriber list.

.
6. PULL-UP BANDS
Without an assisted pull up machine, how was I supposed to work up to a full pull up?  Bands.  Simple as that!  Again, I did my research on these bands and based off my bodyweight (around 140 lbs) and ability, I decided on a green, purple and red band.  These are way cheaper than an assisted pull up machine right???

7. SUSPENSION TRAINER
Notice how I didn't say TRX here?  That's because I was NOT going to pay the price for a name brand system.  Although the exact brand I have is not available on Amazon anymore, there's lots of great options that my clients have found, like this one specifically (same price as what I paid for mine, and way cheaper than a $200 TRX!)

​8. BOSU BALL
At this point in my fitness journey, I knew I was lacking in the area of stability (because I was going through my personal training certification)...  Once I learned what a bosu ball is and learned how they can change almost any exercise and turn it into something totally new, I was sold!  It is now one of my favorite pieces, even more used than my stability ball!

total damage:

Total damage (over the span of 9 months or so) = $1,200

Let's go back to that calculation from before.  If Google says that the average gym membership is $58 a month...
​
$1,200 / $58 = 20.7 months to make up your cost. 

That's under two years!  I bet that you have been lifting in a gym for at least 6 months if you're reading this, so you're a quarter of the way there!  Wouldn't your money be spent in a better place (like your own home) rather than a gym?

what's next?

Now I am not going to lie and say that I do not want anything else for my home gym...  In fact, I have upgraded my dumbbells (but I still bought them used through Facebook marketplace!), and I do dream of buying Olympic barbells and plates...  But until that day comes, I am perfectly happy with the home gym I created because it has given me all the tools I need to progress in my fitness journey!

Do you have any specific things you love in your home gym?  Leave me a comment and let me know!

Pin now and come back later!

How to build a home gym when you like lifting weights. Build a home gym for less than $1,200 with these items! #liftyourlifewithlaura #weightlifting #homegym #homegyminspiration #workouttip #liftweights
Home gym ideas weights without breaking the bank. Create a home gym when you like lifting weights. #liftyourlifewithlaura #homegym #weightlifting #homegym #gymlife #liftweights #workout #workoutroutine
Learn what cheap home gym equipment you need if you like lifting weight! Create a home gym when you like lifting weights. #liftyourlifewithlaura #homegym #weightlifting #homegym #gymlife #liftweights #workout #workoutroutine
4 Comments

why i have 3 types of lifting gloves/straps

2/9/2019

5 Comments

 
How weight lifting gloves can help you achieve fitness goals! Gloves help you exercise correct form. #liftyourlifewithlaura #exercisetip #exercise #gym #lifting #weights #liftweights
I started out like every other woman at the gym... bare handed.  I quickly decided that was NOT for me, because calluses are just NOT my look.  My first ever pair of lifting gloves was from Target and they did exactly what I needed at that time: prevent calluses.  After that first pair wore out, I got a second pair from Target again, even though they were a bit too big (I have REALLY tiny hands), and my hands couldn't really breathe well.

As my lifting experience grew, and as weights got heavier...  I felt I needed some extra help, and my collection of gloves grew...  A lot.  I went from one type of glove to three in about a month! 

Each type of glove/strap has a different benefit, and I will explain it all below! 

Note: Gloves are NOT CHEATING.  As you will see, gloves and straps can really benefit a lifting session because they help to eliminate pain and give you extra support so you can fatigue your legs before your grip!
Some terminology to note before reading:
​
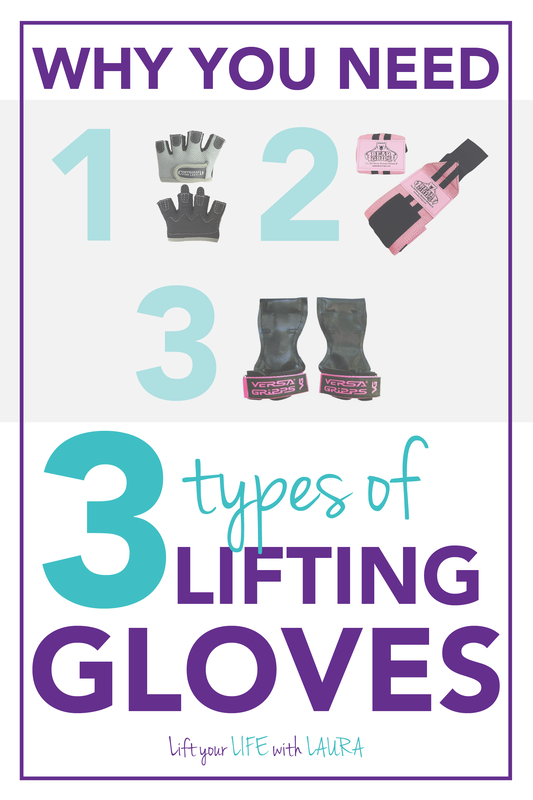
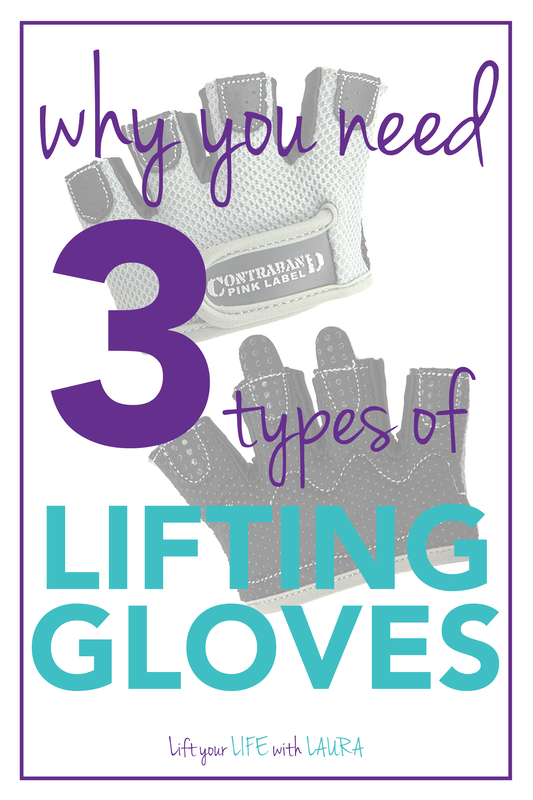
PULLING - any movement that pulls a weight towards your body (deadlift, row, etc)
​PUSHING - any movement that pushes a weight away from your body (bench, squat, etc)

1. "micro" gloves

My first purchase after the Target gloves were these Contraband Womens Micro gloves.  At this point, I was just trying to find something small enough to fit my hands, and Contraband fit the bill with a size XS!!!  I also loved the fact that they were only half gloves, because my hands could breathe more and I wouldn't get so sweaty!

2. straps

My next purchase was a pair of wrist straps from Bear Grips.  The objective here was to give my dinky hands (and dinky wrists) some extra support when doing pushing and pulling movements.  Although these worked great for pushing, they didn't offer me any extra help when pulling.  What I love about these straps too is that they fit so well with the above "micro" glove, letting me use the straps only when really needed (more on that later).

3. extra pulling grip

I was stuck for a LONG TIME with just the above two straps until finally, the owner of my gym blew my mind and showed me Versa Gripps for the first time.  I happened to be coaching a client on a deadlift when he walked by and heard us talking about grip strength and how unfortunately, it just takes a long time to develop.  Although he agreed that is true, he brought us his (too big for me) Versa Gripps and demonstrated how they help with grip.  What you do is close the strap around your wrist and wrap the leather around the bar or dumbbell.  This friction helps to keep your hand on the bar and takes a lot of pressure off your fingers!  I can definitely say that Versas give me an extra 2-4 reps on a barbell deadlift without needing a mixed grip (one overhand and one underhand grip on the bar) 

LIKE WHAT YOUR'RE READING SO FAR?  SIGN UP FOR MORE!

Signup here:

Thank you!

You have successfully joined our subscriber list.

.

2 things to note:

  1. ​Although you DO NOT need all these types of gloves and straps, they can definitely help you feel hard exercises in the correct places, rather than only in your wrists/hands.
  2. You should not ALWAYS use this much support.  Developing true grip strength is always a good choice.

how to use these in YOUR workout routine

My general guidelines are:
  • I use the micro gloves all the time because they don't offer me any support, all they do is protect my skin from rough bars and developing calluses.
  • I use the wrist straps only when I am pushing something HEAVY.  This means I am in the 3-8 rep range on a pushing exercise like benching, pressing, even back squatting (they help my wrists keep the bar stable on my back).
  • ​I use the grips when I am pulling something HEAVY or I am purposely trying to get as many reps as possible.  For me, this means that the grips come out only when I deadlift (most pulling exercises for my upper body are no where near my deadlift weight and therefore do not tire my hands out like deadlifts).

Even though I give these guidelines, EVERYONE is different.  What might feel good to one person might feel bad for the next.  I happen to have a client who has tried a mixed grip and Versa Gripps on her heavy deadlifts and doesn't like either!  Do whatever feels best for you, these are just tips to help you find that!

​What types of gloves/straps do you like?  Let me know by leaving a comment!

Pin now and save for later!

How to pick weight lifting gloves for women. Workout gloves can totally save your hands and perfect your form when exercising! #liftyourlifewithlaura #weightlifting #workoutip #weighttraining #liftinggloves #lifting
Why you need 3 types of weight lifting gloves for women. The type of gloves you use can help with pushing exercises and pulling exercises! #liftyourlifewithlaura #weightlifting #liftweights #workouttip #fitness
5 Comments

OMG DEADLIFTS...

2/7/2019

0 Comments

 
​Seriously, deadlifts are my absolute favorite thing to teach women how to do. I love seeing the “lightbulb” moment when they learn how to shift their hips back in space and pick up whatever weight (or object) is sitting on the ground in front of them.

but deadlifts "aren’t safe"!?!?

Actually, they aren't safe...  ONLY if you do them wrong, just like ANY exercise. The three things you need to remember with deadlifts (in order to do them safely) are...
  1. ​stick that booty out
  2. don't let your shoulders round
  3. keep your back flat
And believe it or not, that’s about all you need it know.

did you know I have a podcast?

how I coach deadlifts

As I said before, deadlifts are my favorite. They are a key exercise to learn and build so much strength in areas that the average person lacks.  If you came to me never having heard of a deadlift, I would explain it as simply picking something up off the floor CORRECTLY.  Because when it gets down to it, that’s all you’re doing: setting yourself up for a lifetime free from your back “going out” due to picking up a kid or laundry baskets with bad form.  After explaining this, I'd give you a simple demonstration without weight, pointing out the fact that I keep my back straight, chest up, shoulders back and knees soft (as seen in the video below).   

Maybe you would be one of the few people that magically “get it” on their first try.  Or, maybe you wouldn't get it on the first try (like the majority of people).  If that would happen, we would walk over to a wall for some "brain training". I am sure you know how to do a squat, so your first deadlift ever will probably look something like a squat.  That's ok!  Everyone does this.  There is a difference to them, and to learn that, all I would have you do is stand close to a wall, facing away from it.  Then, you need to "search" for the wall with your butt ONLY. This might confuse you at first, but I promise there will be a that lightbulb moment as soon as you find the wall.

After the confusion is gone, you'll be shocked about how far back you have to send your hips to hit the wall!  The wall is there to give you faith that you won’t fall over, and when you finally hit it, you WILL feel the weight in your feet transfer into your heels (as opposed to the ball of your foot), a key of deadlifting.  In my video below, you will notice that I almost "rock" back onto my heels.

something to note:

The video below demonstrates ONE type of deadlift VARIATION.  There are many types and those specific videos/posts are on my list to discuss!  For today though, we will work on a "Romanian" or "straight leg" deadlift, the kind that is most easily performed (due to flexibility restrictions).

Once you've done your "hip hinge" experiment from above, it's time to play with flexibility.  ​As you see in the video, my back stays straight and my butt stays out the ENTIRE time the bar is traveling up and down.  This means that I let the bar go down only as far as I can while maintaining that good form.  This means that when you perform a deadlift, as SOON AS you reach a point that causes your back to curl or your shoulders to round forward, it's time to stop!  The point that you just reached is how far down you should go.  Let me reiterate: I would much rather you do a "shallower" deadlift and build up flexibility over time rather than compensate your form just to get closer to the ground.
FOLLOW ME ON INSTAGRAM

finally:

Once you've mastered the hip hinge and keeping your back straight, it's time to add some weight!  Start off with dumbbells and slowly progress up.  The key with a Romanian deadlift is to test your flexibility with each rep...  Each stretch you feel is the stuff that will give you "leg day soreness" the day after!
0 Comments

When are you ready to increase your weights?

12/28/2018

7 Comments

 
Click to learn the signs for when you are ready to increase weights at the gym. Learn how to lift weights for women by a certified personal trainer! Lift your LIFE with LAURA

listen to your body:

Being able to interpret how you're feeling is an important part of working out.  Listening to your body and paying attention to certain cues will help you perfrom exercises safely and in the most effective way.   After reading this post, you'll learn when an exercise is too hard or too easy for you and how to make adjustments!

If you're like a lot of my clients...

Increasing your weight on exercises can be a scary thing to do on your own.  Honestly, most of my clients have told me they don't feel confident enough to do it on their own, and they like to have me there to guide them.  The reality is though, I don't set the rules...  THEY DO.  All I do is watch for their cues and interpret that information for them.  

Signs something is too easy:

  1. you can reach 20+ reps with no fatigue
  2. you can breathe normally after a set
  3. you can perform a timed exercise for over 90 seconds

Signs something is too hard:

  1. you cannot complete two reps with good form
  2. you find yourself holding your breath throughout a movement
  3. you cannot hold a timed exercise for even 10 seconds

my general rule of thumb is:

If you can perform an exercise for 20 reps with good form, increase your weight by 2 - 10 lbs and see how many reps you can do well."

Yes, 2 - 10 lbs is a pretty wide range...  

That's because weighted exercises can vary SO MUCH.  Think about it: increasing by 2 lbs on a dumbbell curl is way harder than increasing by 2 lbs on a barbell squat.  In general, you can increase:
  • by 2 (ish) lbs on upper body, one armed exercises
  • by 5 (ish) lbs on upper body, two armed exercises
  • by 5 (ish) lbs on lower body, one legged exercises
  • by 10 (ish) lbs on lower body, two legged exercises
LIKE WHAT YOU'RE READING SO FAR?  SIGN UP BELOW TO GET MORE INFORMATION LIKE THIS!

Signup here:

Thank you!

You have successfully joined our subscriber list.

.

What about non-weighted and timed exercises?

You got it, we need to increase difficulty on non weighted exercises too!  Whether you are holding side plank, doing pushups or performing TRX rows, you need to increase the difficulty of your modification once things get too easy.  The same rules apply here as stated above.  If you can hold side plank with bent knees for over 90 seconds, it's too easy and it's time to pick a harder modification.  If you can perform 20 beautiful pushups from the wall, they're too easy and it is time to decrease your angle.  If you can perform 20 awesome TRX rows, they're too easy and it's time to walk your feet closer to the anchor point.
STILL WANT MORE HELP?  TRY OUT A PRE-PLANNED WORKOUT ROUTINE:
EASY BUTTON workout plan

Conclusion:

Hopefully this post has given you some extra confidence to kill it in the gym!  Here are some final words of wisdom before you go off on your own though:
Increase weight SLOWLY."
Do not rush through increasing weights.  The faster you go, the easier it is to get injured.
Never increase weights without proper form."
Although increasing weight is an amazing feeling, I never want you to sacrifice form just to hit a new PR.
Do NOT train in only one rep range."
All the ranges have their benefits so it is important to train in each range.  If you want a week to week guide for this, try one of my workout cycles!  Each week of my workout cycles has a different rep range goal and tells you exactly how to group exercises together!

Pin now, save for later!

Click to learn the signs for when you are ready to increase weights at the gym. Learn how to lift weights for women by a certified personal trainer! Lift your LIFE with LAURA
Pin to learn when to increase weight lifting pounds. Learn how to lift weights for women. #liftyourlifewithlaura #liftweights #strengthtraining #strong #workouttip #fittip
Learn how to lift heavy for women. Learn when to increase weights. You are ready to to lift heavy, learn how to increase weights at gym.
7 Comments

Friday feature: movement addition!

12/21/2018

3 Comments


Are you new to exercise?

Picture
​Yes?  Welcome!  Before you skip ahead to the tutorial, I highly advise you download my free Exercise Guide, designed specifically for the woman who hates exercise, like I used to!

After downloading it, you'll learn about the 5 basic types of exercise and learn how often you need to incorporate each type for maximum results.
DOWNLOAD NOW

intro:

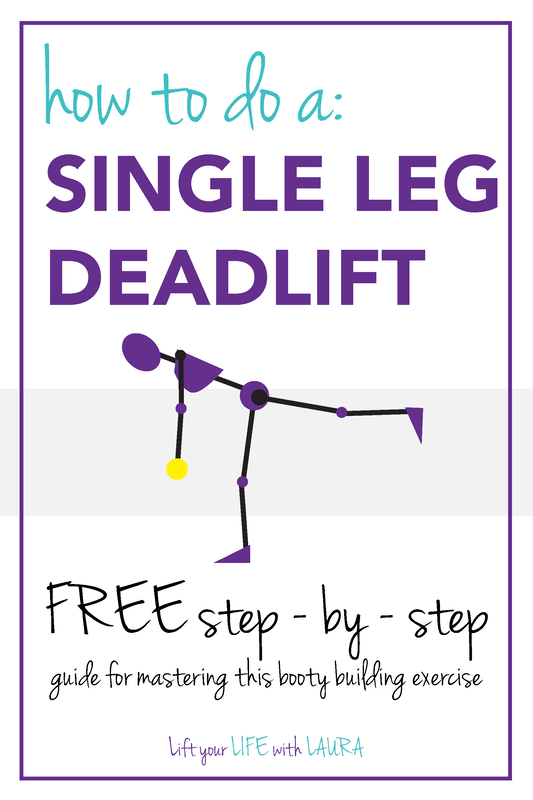
​Today we are talking about one of my absolute favorite movements, the single leg deadlift!  I have heard this move referred to as the "instant butt lift" and that is NO lie.

This movement helps you gain balance, flexibility, glute strength and coordination, all at once!  So how do we do it?

If you are brand new to the exercise, or need a refresher, start with NO weight.  This is a hard move, so master it without weight before moving on.

a single leg deadlift is a "functional movement"

All the exercises I explain in my exercise library are what trainers like to call "functional movements".  This means that they require a whole muscle GROUP to be activated, rather than just isolating one muscle.  These exercises tend to get your heart rate up more, and they help to burn more fat and build more muscle!

I use these functional movements as the primary exercises in my workout plans.  If you want a workout plan that is quick, effective and works well at building your curves and confidence, then make sure to check my workout plans out!  There's routines for every schedule, and you will never get bored from doing the same thing each week!

If you want the workouts PLUS in depth coaching for other areas of your life like confidence, healthy habit creation, goal setting and mindset, make sure to check our my confidence coaching that includes the workout plans along with everything else!  
CLICK TO START LIFTING WEIGHTS ON YOUR OWN
CLICK FOR A CONFIDENCE WORKBOOK

step by step:

First, firmly plant one foot on the ground, making sure your toes are pointing forward. TIP: slam you foot down on the ground a few times. This helps your brain focus on keeping that foot firmly planted. Once you have your foot set in place, slowly lower both hands down towards the ground as your other leg swings back in space. You want to imagine that your body (minus your planted leg) is a pendulum. This means that from your head to your heel makes a straight line and stays that way throughout the entire movement.

Reach down as far as you can, but ONLY to a depth where you can still keep your back FLAT. Do not let your shoulders round forward and do not let your hips tuck under. The knee of your planted leg is allowed to bend slightly, it should NOT be locked. As you gain more flexibility, you will be able to reach closer to the ground. Your shoulders need to stay
parallel with the ground, DO NOT twist just to reach a bit farther.

Now that you are at the bottom of the movement, it is time to get yourself back up. Push through your heel to slowly bring yourself back up to standing. TIP: slow is pro! The faster you perform this movement, the easier it will be to lose your balance. By performing it slowly, you give your body extra time to react to your changing center of gravity. Once you are back to standing, feel free to set your foot down and regain balance. Continue your reps and then repeat on the other side!

If you feel your booty burning, you're doing it right!  Not sure how and when to incorporate this great glute move?  My workout cycles do the thinking for you!
Click for a video of how to master the single leg deadlift. This exercise is the best way to strengthen glutes! Lift your LIFE with LAURA.
LIKE THESE EXERCISE DESCRIPTIONS?  SIGN UP BELOW TO BE NOTIFIED WHEN I POST MORE!

Signup here:

Thank you!

You have successfully joined our subscriber list.

.

variations:

  1. If you are having trouble with balance or keeping your leg extended in back of you, try performing the second part of the movement only.  Stand in front of a bench and reach down to place your hands flat on the bench.  While keeping your back straight, extend your leg back.  Then, push through your heel into the floor and bring yourself up to standing.  Place both feet on the ground, bend over again and repeat.
  2. If performing the exercise without weight is too easy, try adding a dumbbell or two!  My favorite way to perform it is also the hardest.  As shown in the video, I am holding one dumbbell in the OPPOSITE hand as my planted leg.  An easier variation is to hold the dumbbell in the same hand as your planted foot.  You can also use two dumbbells, one in each hand.

conclusion and how to learn more:

Single leg deadlifts are one of the best ways to challenge yourself and build amazing glute activation, strength and size.  Sign up below to get even more FREE tips like this delivered straight to your inbox so you don't miss out.
* indicates required
interests
3 Comments

    Author

    My name is Laura and I help overly tired 20something women overhaul their lives, energy and confidence without overwhelm.

    Categories

    All
    Coaching
    Confidence
    Cooking Tips
    Deadlift
    Exercise Library
    Fit Foodie
    Glutes
    Healthy Habits
    Holiday
    Lifestyle
    Lifting
    Mindset
    Mirror Talk
    Natural Living
    Podcast
    Product Recommendation
    Self Care
    Video
    Visualization
    Workout Tips

    RSS Feed

    DISCLAIMER:
    Although I am a Certified Personal Trainer through the National Academy of Sports Medicine and write to the best of my knowledge on fitness, nutrition and lifestyle practices, I cannot be made liable to know all information on a particular subject.  Knowledge gained through this blog is to be used at your own risk and all lifestyle changes should be discussed with a doctor before starting.
     
    I am also a participant in the Amazon Services LLC Associates Program, an affiliate advertising program designed to provide a means for sites to earn advertising fees by advertising and linking to Amazon.com.  I do receive a small reimbursement for sales made through the links provided on my blog.


    BrandBacker Member
Picture

work with me

contact

Proudly powered by Weebly
  • home
    • my story
  • work with me
    • personal training >
      • testimonials
      • the studio
  • contact